 My girlfriend bought a handheld gps with an integrated compass sensor. I was fascinated by watching the virtual pointer turn around (in realtime) depending on the current heading. That was the moment were I was inspired and thought that this could not be that hard and can easily be rebuild.
So I decided to try it by myself. Because I had all the necessary things laying around it was pretty fat forward to get started.
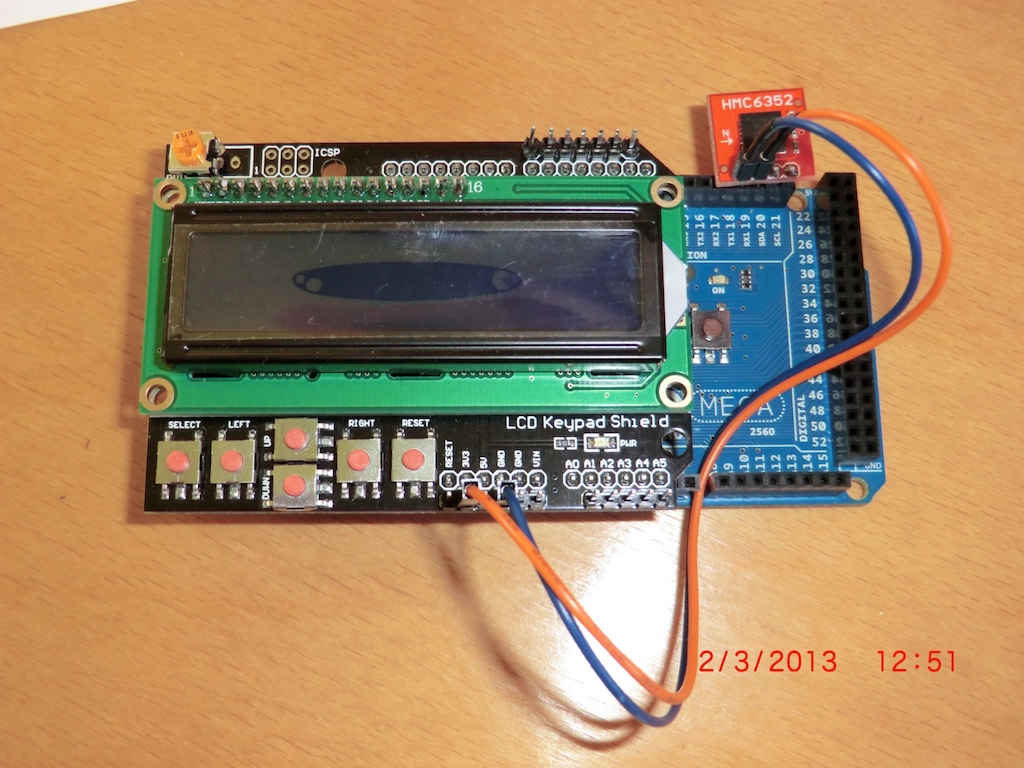
- Arduino Mega
- LCD Shield
- Jumper Wires
- Compass Module: Just ordered the HMC6352 on a breakout board from sparkfun
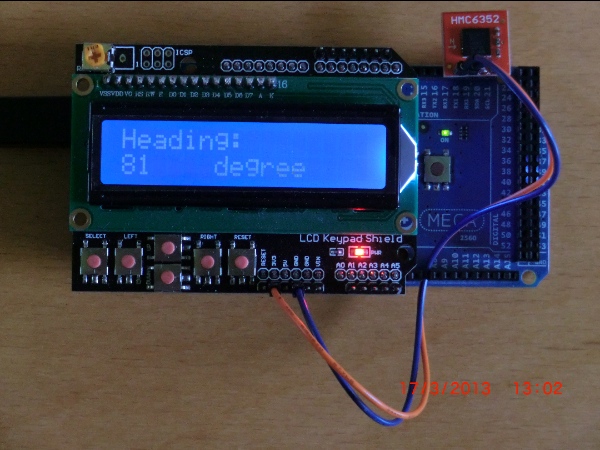
First I tried to retrieve data from the HMC6352 module and tried to display it with the LCD shield.
It is a bit tricky to get the heading data from the HMC6352 module, because it is connected to the Arduino via I2C. Therefor it is very important to have the datasheet at hand (and the knowledge how to read and send data wih the arduino via I2C).
How to read and send data via I2C can be found at the Arduino Playground.
How does the arduino sketch work - implementing the compass communication protocol
The HMC6352 listents for a character, depending on the character the compass sends the requested data to the Arduino. Sending an "A" returns the current heading. The returned data consists of two bytes, the HIGH-Byte and the LOW-Byte (16 bit in general).
When this is interprete as an integer we get values from 0 - 360 degree, depending on the heading, where 0 degree equal North and 180 degree equal South.
The LCD-shield shows the current heading in degree. In parallel to this, the current heading value is sent to the computer via the TTL-serial interface (at 9600 baud).
Implementing data visualisation using python turtle graphics
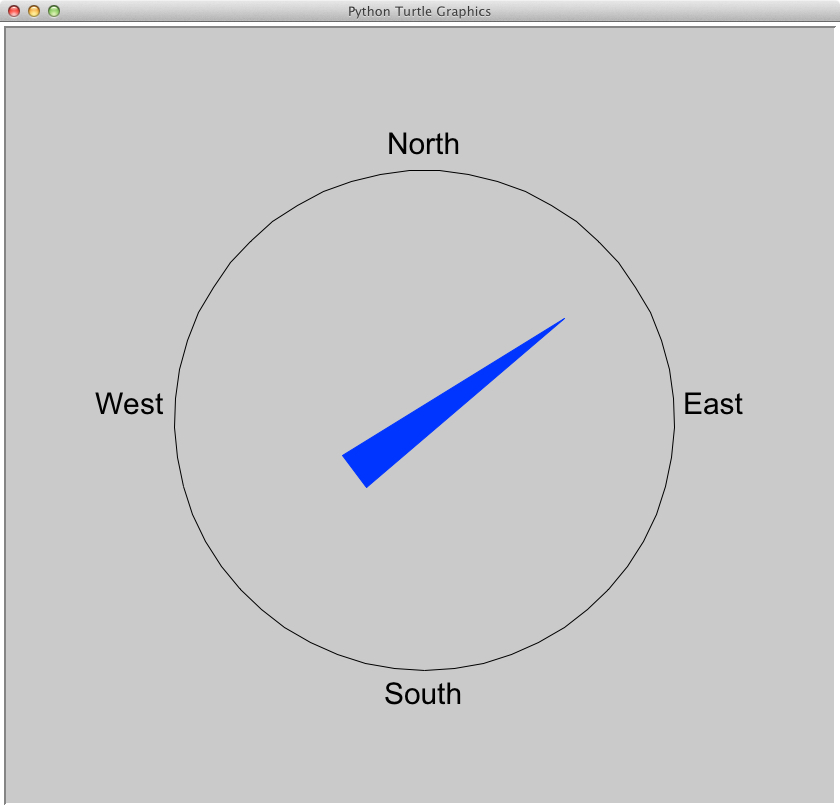 This is the "interface". It is developed with the turtle graphics module, which is available within the standard python installation. I did use Python 2.7.1 on my Mac (10.7, I am using the Python installation provided with the OS).
The turtle graphics is build ontop of tkinter and is very easy to use. At the beginning you have an "arrow" on a canvas. With the commands "forward(distance), left(angle), right(angle)" you can draw on the canvas.
These steps are necessary to get the interface and compass working properly:
- Draw a circle and name the headings
- Either create your own shape (this is my pointer) or use an exising one (I used the shape "triangle")
- Install the pyserial packages (https://pypi.python.org/pypi/pyserial)
- Set up the serial interface in python and connect your Arduino
The reason why I used the turtle graphics and not tkinter directly is the following:
Drawing on a canvas with the turtle graphics is easier than drawing on a canvas with tkinter. But the main reason is, that the turtle understands methods like settiltangle(angle). With this method I was able to get my pointer turning. I chose the shape "triangle", with the command turtlesize() I enlarged my turtle. Then I decided to color it blue. The only thing which is still left is reading data from the serial interface, transforming it to an integer and call the method compasspointer.settiltangle(received_data). This can be run in an endless loop and ready is the compass!
